
Hobbies & Crafts
Punch Needle Embroidery for Beginners: The Complete Step-by-Step Guide
No sewing machine, no prior stitching experience, and a first finished piece in under an hour — here's everything I wish someone had told me before I bought my first needle.
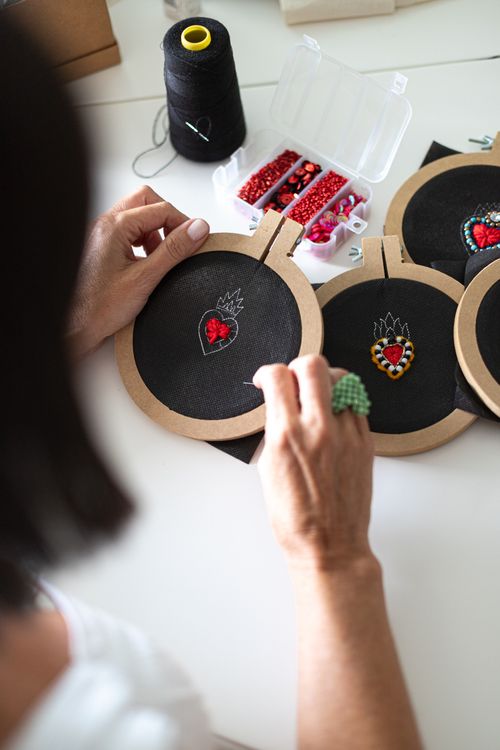
I picked up a punch needle for the first time on a rainy Tuesday because I'd run out of patience with cross-stitch. Counting threads under bad lamp light was not relaxing me the way it was supposed to. A friend handed me a wooden-handled punch needle, a scrap of monk's cloth stretched in an old hoop, and a ball of yarn, and told me to just push it through and pull it back. That was the entire lesson. Twenty minutes later I had a lopsided little cloud shape and I was completely hooked.
That's really the whole appeal of this craft in one story. Punch needle embroidery isn't fussy. You don't need years of practice to make something that looks intentional, and you don't need a workshop's worth of equipment to get started. If you've been curious about it — maybe you saw a fuzzy little mushroom or a cloud-shaped wall hanging on Pinterest and wondered how on earth it was made — this guide will take you from a completely blank fabric to a finished piece, and cover the mistakes that trip up almost every beginner along the way.
What's covered in this guide
- What punch needle embroidery actually is
- Why it's such a good hobby for beginners
- The full supply list (with real price ranges)
- Choosing fabric and a hoop
- Step-by-step: your first project, start to finish
- Seven mistakes almost every beginner makes
- Easy first project ideas
- Finishing, care, and framing tips
- Can you sell what you make?
- Frequently asked questions
What Punch Needle Embroidery Actually Is
Punch needle is a fiber art where you push loops of yarn or thread through a woven base fabric using a hollow needle, rather than stitching in and out the way you would with a regular embroidery needle. The tool does the work for you in a sense — you punch down, the needle deposits a loop, you slide across the surface, punch again, and a row of loops builds up behind you. Turn the fabric over and you're looking at the smooth, "right" side. The looped, textured side stays hidden until you decide to flip the whole piece and use that as the front instead, which a lot of makers do for a shaggier, rug-like look.
The technique has been around for well over a century in one form or another. Rug hookers in the American Northeast and Canadian Maritimes were making the same kind of looped textile art in the 1800s using large hooks and heavy wool, mostly for practical floor coverings made from worn-out clothing scraps. The small, fine punch needles that are popular now — the ones used for delicate wall art, patches, and pillow covers — are really a miniaturized, craft-store-friendly descendant of that older rug-hooking tradition. Some old-school fiber artists still call the fine version "Russian punch needle" or "needle punch," and you'll see all three terms used more or less interchangeably online, which can be confusing when you're first searching for supplies.

Why This Is Such a Good Hobby for Beginners
A lot of needlework hobbies ask a lot of a newcomer before they reward you with anything that looks decent. Punch needle is unusual in that the learning curve is almost flat for the first project and then gets more interesting as you go, rather than the other way around.
- You see results immediately. There's no long stretch of "trust the process" before something recognizable appears. Within your first ten minutes you'll have a filled-in patch of color to look at.
- The barrier to entry is genuinely low. A basic starter kit runs somewhere between $15 and $30, and you can be productive with a single needle, one hoop, and three or four colors of yarn.
- Mistakes are forgiving. Pull a loop out with tweezers, re-punch it, done. There's no unraveling a whole row the way you sometimes have to with knitting.
- It's genuinely repetitive and calming. The punch-slide-punch rhythm is close to a fidget activity once your hands learn it, and a lot of people use it specifically to unwind in the evening.
- Small projects finish fast. A coaster or a small hoop piece can realistically be done in one sitting, which matters if you tend to lose steam on multi-week projects.
- It travels reasonably well. A small hoop, a needle, and a couple of yarn balls fit in a pouch, so it's a workable hobby for commutes or waiting rooms, as long as you have somewhere stable to rest the hoop.
None of that means it's a "lesser" craft, by the way. Once you get comfortable with the basic motion, punch needle opens up into genuinely complex work — shading with multiple yarn weights, mixed textures, sculptural high-and-low loop designs, even fully three-dimensional rugs. Beginners just get to enjoy the payoff earlier than they do with most other needle arts.
The Complete Beginner Supply List
You don't need to buy everything on this list before your first attempt. If you want to test the waters cheaply, a pre-assembled beginner kit from a craft store or Etsy seller will include most of this in one box for around $20. But if you're putting your own supplies together, here's what actually matters and roughly what it costs.
| Item | What to look for | Typical price |
|---|---|---|
| Punch needle (adjustable) | An adjustable wooden or acrylic handle that lets you change loop depth. Skip the single-fixed-depth plastic ones at first. | $10–$22 |
| Base fabric | Monk's cloth or weaver's cloth, both loosely woven and forgiving to punch through. | $8–$14 per yard |
| Embroidery hoop or gripper frame | A wooden hoop 6–10 inches wide, or a purpose-made punch needle gripper frame that holds tension better. | $6–$25 |
| Yarn or embroidery thread | Worsted-weight acrylic or wool yarn for standard needles; embroidery floss or pearl cotton for fine needles. | $3–$6 per skein |
| Sharp embroidery scissors | Small, pointed blades for trimming close to the fabric without cutting loops on the front. | $5–$15 |
| Fabric marker or chalk pencil | Washable or heat-erasable, for tracing your pattern onto the fabric. | $3–$7 |
| Fabric glue or fray-stop sealant | Applied to the back once finished, so loops don't pull loose over time. | $5–$8 |
Budget tip: If you want to try this before committing to a full kit, one adjustable punch needle, a half-yard of monk's cloth, and three skeins of yarn will run about $18–$25 total and is enough for two or three small practice pieces.
Choosing Your First Fabric and Hoop
This is the step beginners skip most often, and it's the reason so many first attempts end in frustration that has nothing to do with skill.
Fabric: Stick with monk's cloth for your first several projects. It's specifically woven with the right thread count and looseness for punch needle work, so the needle glides through without fighting you. Regular cotton quilting fabric, canvas, or anything tightly woven will make every single punch feel like a workout and will shred your yarn over time. This one substitution solves probably half of the "this is harder than it looks" complaints you'll see in beginner forums.
Hoop or frame: Whatever you use has to hold the fabric drum-tight, like the surface of a trampoline. A loose hoop is the second most common cause of beginner frustration, because a loose fabric surface makes it nearly impossible to get consistent loop height. A basic wooden embroidery hoop works fine if you tighten it properly and re-tighten as you go, since fabric relaxes with handling. A dedicated gripper frame, which has small teeth or a fabric-gripping edge along all four sides, holds tension much longer and is worth the extra few dollars if you think you'll stick with the hobby past one project.
Step-by-Step: Your First Punch Needle Project
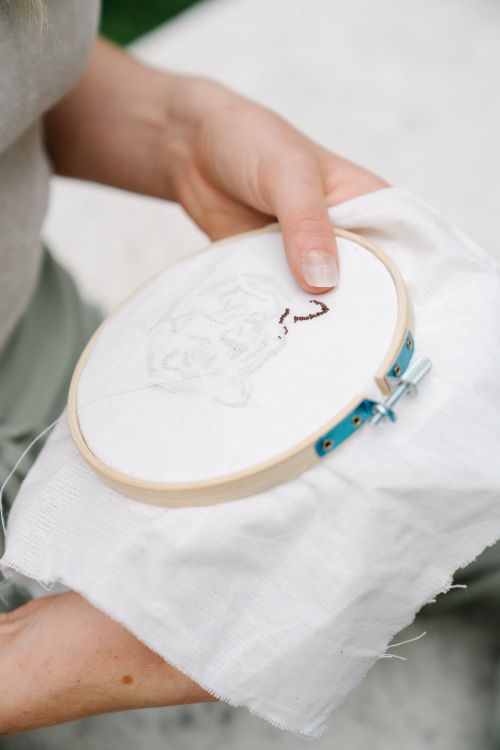
- Stretch your fabric.Lay the monk's cloth over the inner ring of your hoop or frame and press the outer ring (or gripper edges) down firmly. Pull the fabric taut from all sides as you go, the way you'd tighten a drum skin. You should be able to tap the surface and hear a faint drum-like sound. If the fabric has any give when you press it with a finger, tighten it further before continuing.
- Trace your design onto the fabric.Use a washable fabric marker to draw your pattern directly onto the front (smooth) side of the monk's cloth. Keep the first design simple: a single shape like a mushroom, a heart, or a rounded cloud is plenty for a first project. Remember your traced lines will show on the finished loop side if you're careless with placement, so keep marks light and only where you intend to punch.
- Thread the needle.Follow your specific needle's threading path exactly — most adjustable needles have a small diagram printed on the barrel or included in the packaging. Getting the threading order wrong is the single most common reason a first-time punch needle "doesn't work," so double check before you start punching.
- Set your loop depth.Adjustable needles let you dial in how deep the needle sits, which controls loop height. Start at a medium setting and test on a scrap corner of fabric first. Deeper settings make longer, shaggier loops; shallow settings make a tighter, more velvet-like texture.
- Find the right angle.Hold the needle like a pencil, with the opening of the needle's tip facing the direction you intend to move next. Punch straight down through the fabric until the handle touches the surface, then lift back up to just above the fabric — not all the way out — before sliding a few millimeters and punching again. Lifting the needle too far out of the fabric is what causes loops to pull loose on the other side.
- Punch your outline first, then fill in.Trace the outline of your shape with a single row of loops before filling the interior. This keeps your edges clean and gives you a boundary to work inward toward, which is much easier than trying to fill a large area and hit a precise edge from the inside out.
- Fill the interior in rows.Work back and forth in rows, keeping each row snug against the last so no bare fabric shows between them. Rotate the hoop as needed rather than twisting your wrist into an awkward angle — your hand should stay comfortable throughout.
- Check the front as you go.Flip the hoop over periodically to see the smooth "right" side and confirm loops are even and not pulling out. It's far easier to fix a thin patch now than after the whole piece is finished.
- Trim any stray fibers.Once the shape is fully filled, use sharp embroidery scissors to trim any uneven loops or stray fuzz on the looped side, cutting carefully so you don't snip through a full loop by accident.
- Seal the back.Apply a thin, even layer of fabric glue or a fray-stop sealant to the back of your finished piece and let it dry fully, usually a few hours. This locks every loop in place so they can't be tugged loose with normal handling.
- Trim, mount, or frame.Once the glue is completely dry, trim excess fabric, leaving enough of a border to fold under or mount into a hoop frame, embroidery display frame, or backing fabric of your choice.
Seven Mistakes Almost Every Beginner Makes

1. Using the wrong fabric
Covered above, but worth repeating because it's genuinely the root cause of most "I think I'm just bad at this" moments. If your needle is fighting you on every punch, check your fabric before you blame your technique.
2. Loose hoop tension
A saggy fabric surface makes it almost impossible to control loop depth consistently. Re-tighten every few minutes, especially early on before you've built calluses on your fingers from pulling fabric taut.
3. Lifting the needle too far out
The needle only needs to clear the surface of the fabric between punches, not lift several inches into the air. Lifting too high pulls the previous loop back out with it, which is the most common cause of thin, patchy-looking fill.
4. Changing direction mid-punch
Twisting the needle while it's still in the fabric can shred the yarn or snag the weave. Complete each punch straight down and straight back up before you reposition.
5. Fighting the yarn tension in your hand
The yarn should feed smoothly from your ball or skein without you gripping or tugging it as you punch. If you feel resistance every time you slide the needle, check that the yarn isn't caught on itself or wound too tightly around your holding hand.
6. Skipping the seal step
It's tempting to call a piece finished the moment the last loop is in place, but skipping the fabric glue on the back means loops can work themselves loose the first time the piece gets bumped, brushed against, or handled by a curious pet.
7. Starting with a design that's too detailed
Fine details, small text, or intricate shading are genuinely harder to execute with a punch needle than with regular embroidery, because the loop itself has a minimum practical size. Save the detailed florals and lettering for after your third or fourth project, once your loop control is more consistent.
Easy First Project Ideas

Pick something with soft, rounded edges rather than sharp corners or thin lines for your very first attempt. A few reliable starter shapes:
- A single mushroom or cloud — rounded shapes are easier to fill evenly and hide small inconsistencies well.
- A round coaster — small enough to finish in one sitting, and useful once it's done, which is a nice bit of motivation.
- Initial letter patch — a single thick block letter, not a full word, keeps the outline simple while still feeling personal.
- A small abstract patch of color blocks — no drawing skill required, and it's a genuinely good way to practice keeping rows even.
- A tiny keychain or bag charm — low-stakes, portable practice, and a nice small gift once finished.
Save landscapes, faces, animals with fine detail, and anything with text longer than a single letter for after you've completed two or three simpler pieces. There's no rule against attempting something ambitious right away, but a frustrating first project is the number-one reason people put the needle down and never pick it back up.
Finishing, Care, and Framing Tips
A punch needle piece is more delicate on the back than it looks, at least until the glue is fully cured. Give sealant a full 24 hours before handling the piece roughly, hanging it, or trimming close to the edges.
For display, small pieces work well left in their original wooden hoop as the frame — trim the excess fabric on the back, glue it down neatly, and add a hanging loop or sawtooth hanger. Larger or more finished pieces can be mounted onto a backing board and placed in a shadow box frame, which also protects the looped texture from dust and handling.
For ongoing care, a soft brush or low-suction vacuum attachment works to remove dust from finished pieces. Avoid direct, prolonged sunlight, which will fade yarn colors over time the same way it fades any textile.
Can You Actually Sell What You Make?

Once you're past your first few practice pieces, punch needle is genuinely one of the more sellable handmade crafts, mostly because the finished texture photographs well and small items are cheap to produce. Coasters, patches, small wall hangings, and keychains are the easiest categories to start with, since materials cost per item stays low and production time per piece is short compared to something like a full-size rug.
If you're thinking about turning this into a small side project rather than purely a hobby, price your early pieces to cover materials plus a fair hourly rate for your time, even if that number feels high at first. Underpricing handmade work is a common early mistake, and it's much harder to raise prices later than to start at a number that actually reflects the labor involved.
Frequently Asked Questions
Is punch needle embroidery hard to learn?
No — it's one of the more approachable needle arts for absolute beginners. Most people can produce a small, presentable piece within their first hour of practice, though getting loop height fully consistent typically takes a few projects.
What's the difference between punch needle and rug hooking?
They're closely related techniques from the same textile family. Traditional rug hooking uses a simple hook pulled from the front of the fabric, usually with heavier wool, for durable floor rugs. Punch needle uses a hollow needle that deposits loops as it's pushed from the back, and modern fine punch needles are typically used for smaller decorative pieces rather than rugs.
Can I use regular embroidery thread instead of yarn?
Yes, with a fine punch needle designed for thinner materials. Standard adjustable punch needles are sized for worsted-weight yarn, while a separate fine needle handles embroidery floss or pearl cotton for more delicate, detailed work.
Why do my loops keep falling out?
This is almost always one of two things: the needle is being lifted too far off the fabric between punches, or the base fabric isn't held tightly enough in the hoop. Check both before assuming it's a threading issue.
What fabric is best for punch needle beginners?
Monk's cloth is the standard recommendation because its loose, even weave is specifically suited to punch needle work. Weaver's cloth is a close second choice. Tightly woven fabrics like quilting cotton or canvas make the technique much harder than it needs to be.
How long does a small punch needle project take?
A simple coaster-sized piece typically takes 20 to 45 minutes for a beginner. A hoop-sized wall piece, roughly 6 to 8 inches, usually takes one to three hours depending on how much detail and color changing is involved.
Do I need an embroidery hoop or a special gripper frame?
A standard wooden embroidery hoop works fine for beginners as long as it's tightened properly and rechecked as you work. A dedicated gripper frame holds tension longer and is a worthwhile upgrade once you're doing more than the occasional project.
Can kids do punch needle embroidery?
Older children, generally around age 8 and up, can manage a basic punch needle with supervision, since the needle tip is sharp and the motion takes a bit of hand coordination. Younger children may do better with a blunt plastic punch needle made specifically for kids' craft kits.
Punch needle embroidery rewards patience without demanding much of it upfront, which is a rare combination in the world of needle crafts. Start small, use the right fabric, keep your hoop tight, and give yourself permission for your first piece to look a little rough around the edges. The technique gets more precise the more you practice it, and most people find their second or third project already looks noticeably more polished than their first. If you make something you're proud of, a hoop display or a small shadow box frame is often all it takes to turn a practice piece into something worth hanging on the wall.